Ok,
now to every pixel mad housewife's dream. Pixelling the interior
of a kitchen. It can be any kitchen you want. A made up one, your
kitchen at home, hell it can even be a kitchen that isn't actually
a kitchen. Me, I like to make up my own interiors and designs.
So here we go, watch my process and steps carefully and then in
your own time make your kitchen from scratch (don't copy mine
in other words.)
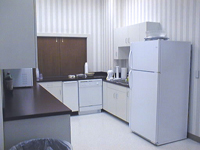
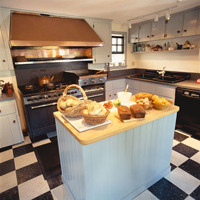
Step 1. First step I always take when i'm pixelling a scene, is
I browse the net using Google Image Search for reference pictures
to help me design and draw (relatively ok looking) objects and
architecture. Below are some photographs of kitchens and kitchen
objects that I could use in my scene.
Step 2. Next I draw the basic outline of my room space in which
the kitchen will eventually fit in to. Remember to always start
with a basic outline and leave all the colouring and shading to
last. As you can see below, my kitchen is a basic cube shape with
one side being longer than the other.
 Figure
6.5
Figure
6.5 |
Step 3. Ok, now inside of my cube I begin to map out and draw
the cupboards and overhead thingys that kitchens have. Take your
time in this particular section and plan out where you are going
to place things. Look below at my example and you will see that
I have some nice benches and cupboards.
 Figure
6.6
Figure
6.6 |
Step 4. We've got benches and cupboards and overhead thingys,
now we need some objects. Objects include such things as refridgerators
and ovens, even plates and glasses. Ok, around the outside of
my scene I start to draw all the objects I want to place around
my kitchen (remember to keep them as isometrical as you can).
I then select each object and place it where I want it to go in
my scene (look in the second example picture), or copy and paste
it and then place it around my scene. Such things as plates or
glasses can easily be copied and pasted to save you the trouble
of recreating them each time you want to use one in your scene.
  Figure
6.7 Figure
6.8
Figure
6.7 Figure
6.8 |
Step 5. Look at how messy my scene is! To fix this all we need
to do is go around the scene, erasing lines that would appear
behind other objects. Once this is done you should have the basic
outline of your entire scene. Look at my scene so far if you are
unsure of what I mean.
Figure 6.9 |
Step 6. Ok, now we colour it in like a colouring in book. Get
your fill tool and go around your scene, colouring everything
to your satisfaction. Remember to use darker shades of colours
to give objects shading and always remember to use a light source
when you are shading your scene.
 Figure
7.0
Figure
7.0 |
Step 7. After colouring and shading, it's time to highlight. Go
around your scene and find the sharp edges. Things such as the
edge of a cupboard or benchtop will need a highlight. Once you
have done this it should look similar to mine below (don't make
it exactly like mine or you won't have learnt anything.)
Figure 7.1 |
Step 8. Add a few people that you've created in the other tutorials
or just leave it how it is. Save the BMP file as a GIF or PNG
in an image editing program such as Photoshop or The Gimp (freeware).
Please remember not to save your work as one of these filetypes
in MS Paint. Paint tends to totally ruin your work if you attempt
to save it as something other than a BMP. Show it off to your
friends and family and receive criticism as to where you could
improve next time. Always remember to take comments as a learning
experience, and don't get angry if they are negative, just improve
on it next time.
|