Texturing
your objects and buildings make your pieces more interesting and
pleasing to look at. Going for the plain coloured look can be
good if you are giving it that cartoonish look, but usually it's
a tad boring to look at. A building is usually made of bricks,
so why not give it a nice brick texture on its walls. This can
be achieved by following this small tutorial below.
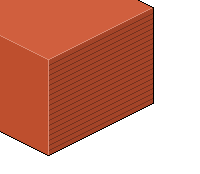
Step 1. Draw evenly spaced horizontal (iso-horizontal) lines across
the side of your wall, using a darker colour than the original
wall colour.
 Figure
3.6
 |
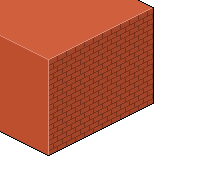
Step 2. Once this is complete, go along drawing small vertical
lines that jump each line as you move down. They also need to
be evenly spaced as you move along.
 Figure
3.7
 |
Step 3. Now repeat this process on the gaps that have no vertical
lines, drawing each small vertical line in the middle of the 'brick'
above. There you have it, the simple brick texture.
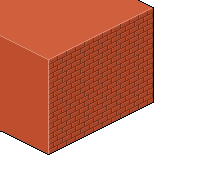
Step 4. To make it more brick-like and nice to look at, we're
also going to add highlights to every brick to make them stand
out more. So, decide (or look) at where your lightsource is, and
highlight the part of each brick that the sun will be directly
hitting (with a lighter colour).
 Figure
3.8
 |
As you can see, texturing isn't all that hard, and once you get
it down you'll never have another plain looking wall again. Now,
we'll look at some other texturing examples.
|